Installation
Installing the software
Important
Please make sure your operating system is completely up to date (check Windows Update)
- Visit the QBKEY software page at Downloads page.
- Click on the GET QBKEY SOFTWARE. The install file will be downloaded.
- Execute the downloaded file.
- Once everything is installed the software will launch automatically for the first time.
- Additionally, a shortcut icon will be placed on the desktop.
Note
Video: Downloading The QBKEY Software.

Setting up the hardware
Connect one of your QBKEYs with the provided USB-C cable to your computer. After a few seconds the key should show up in the list.
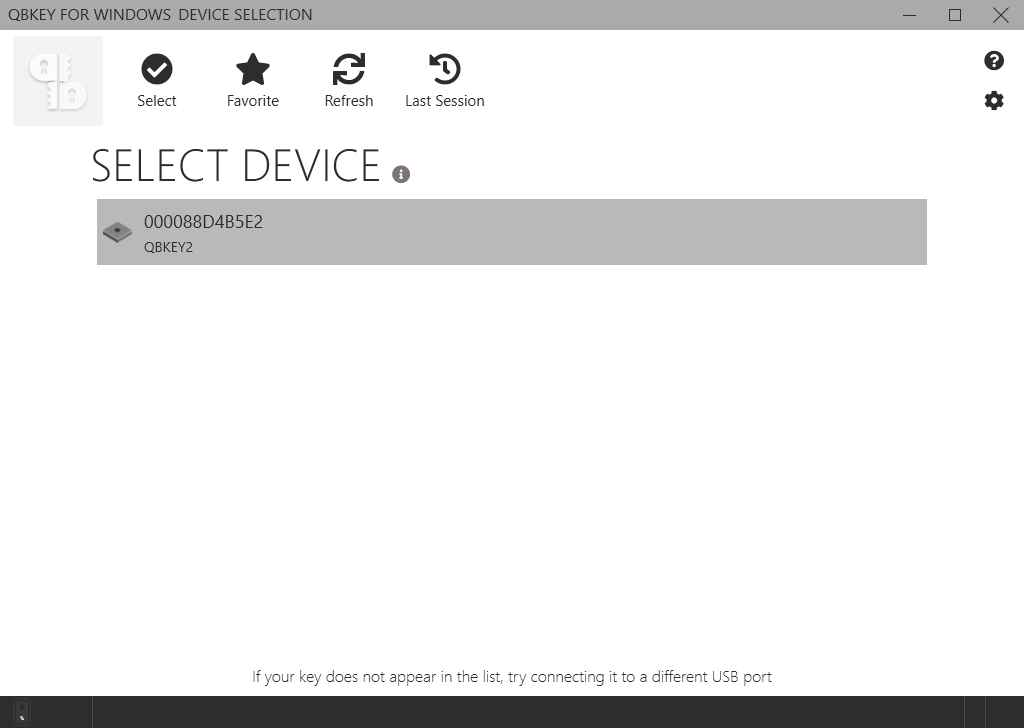
If your QBKEY does not appear, press the ‘Refresh’ button on the top menu. When the key still does not show up in the list, try another USB-port on the computer (in case you don’t have any spare ports, swap it with another connected device).
Double click the device or single click the device and click the “Select” button in the top menu bar for initialization. Enter the “Pairing ID” printed on the back of the QBKEY device into the appropriate fields Every time you connect your QBKEY device to a new computer, you will have to enter the “Pairing ID”, which is to prevent your USB communication from MitM attack.
On the Select Device page, you can mark your selected QBKEY as a favorite device. You can do this by clicking the device followed by clicking the “Favorite” button in the menu. Your favorite device will be marked by a star and will always be visible at the top of the list. If you want to delete you favorite QBKEY, you need to go to the Configuration page and click “Forget favorite device” button.
Note
Video: Starting First Time.